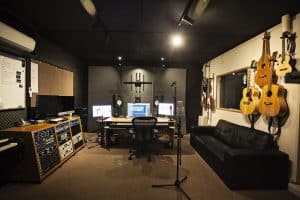
Getting the best mix in a Sydney sound studio is an art form all its own. If you are new to mixing and want to sharpen up your skills and ears, this blog is for you!
General goals for mixing and balance
One of the most important thing about mixing is having goals and ideas about what you want in a recording studio. With out these you can easily wander aimlessly for hours playing with faders and eq. It can be a frustrating time killer in a recording studio so follow these pointers to keep you on track:
One technique is to just simply work out your volumes and balance before adding compression or heavy EQ. No amount of processing will fix an un-balanced mix. Sometimes it can be a good idea to strip everything back to silent and fade in each track one at a time manually using your ears. It is good to do this while looping a section in the middle of the song where most instruments and sounds are in play already. Of course you will have to rebalance after adding compression and other processes. With a good starting point in any you will find it so much easier Sydney recording studio.
The next step in getting the best mix is to work on the panning. Panning can make a world of difference to the over all feel of your mix. Try and get a balance between left and right. The drum kit is particularly important in this regard.
When mixing drums, try and keep the solid hard hitting rocks of the kick in the centre. I’m referring to the bass drum and the snare. When they are central the mix will feel grounded and punchy. Hi-hats and auxiliary percussion like shakers and tambourine usually do well sitting between 0 – 20 from the centre. Experiment with different positions. When it comes to more unusual percussion like bongos, congas, timbale and even Tom-toms, you can be more extreme. Anywhere from 40 to 90 is good. Remember to keep them in balance and not outweigh one side over the other. Also it is worth bearing in mind that if you pan anything hard right or left you will lose it in a mono playback.
Bass is similar to bass drum and usually fairly central. The separation between those too (if needed) can be adjusted using compression and slight variance of EQ. Lead vocal is the other thing that belongs fairly close to the centre.
All the other instruments can comfortably fit to the left or the right. This is again a matter of experimentation. Using stereo effects on something think like an organ will ensure you don’t get weighed down on one side. Having said that you don’t want a thick rhythmic and chordal instrument clogging up the centre.
The importance of EQ
One of the most powerful and intimidating aspects of mixing can be EQ. EQ has the power to separate instruments and draw out the unique characteristic of each element. for example a hi-hat can really sizzle and shine between 5-10k. A bass guitar will have more attack if you boost 700HZ. These are just examples and it is really worth studying this in a more in depth way. It is worth learning the characteristics of each instrument and what EQ’s correspond with the sounds you are trying to enhance in your Sydney recording studio.
One of the biggest challenges producers and engineers face is cleaning up the muddy low mids. Removing unwanted frequencies is actually as important as enhancing. Adjusting the reverb EQ is equally important. Most reverb plugins have an EQ attached to them and it is important to un-clog the lower mids so things don’t get muddy. There are often presets you can use to make sure the splash around in stereo does not get to wild. Remember that the frequencies amplified in your EQ plugin will affect the whole mix. Make sure you adjust them individually for each track and also for global reverb. This blog does not go into that amount of detail but I highly recommend studying and experimenting with each instrument. Here is a great link for understanding the basics of EQ in a sound studio: Produce like a Pro.
Allowing your mix to breath with compression
Compression is similarly difficult to get your head around. Having said that there are some really straight forward principles around compression in a Sydney sound studio that can have your mix sounding punchy and clear. Not every studio is equiped with a pair of state of the art LA-2A’s like Crash Symphony Productions, but there are great plugins that can get you started in an amateur recording studio. A great way to start compressing a track is to find the loudest/busiest part of the mix and take each instrument until it shines. Hard sounding snares and intrusive lead guitar will need heavier compression but subtle vocals require less tampering. You dont’ want to suck the life out of your mix by compressing everything too hard. Here is a great site for improving your skills and understanding the basics of compression in a Sydney Recording Studio: Musician On a Mission.


